Best Methods to Teach Handwriting to Kids: 10 Ways Compared


Founder, Younglabs — partner across your child's learning journey
Engineering gold medallist · ISB Postgraduate · Building Younglabs across Foundations, Academic Excellence, University & Beyond
10 Aug 2026 · 23 min read
_____________Education
Two ways to fix this at home this week
Letter and word pages, sorted by age.
Book a free handwriting class (ages 5–13) →There is a particular kind of frustration that appears when a parent has already tried everything that seems obvious. The child has copied letters, filled handwriting books, practised cursive, been reminded to "write slowly," and still produces letters that change size halfway across the page. Another child of the same age seems to pick up handwriting almost naturally. The temptation is to conclude that one child simply has better handwriting ability. In reality, the method used to teach handwriting can make a considerable difference because different methods address different parts of the writing process.
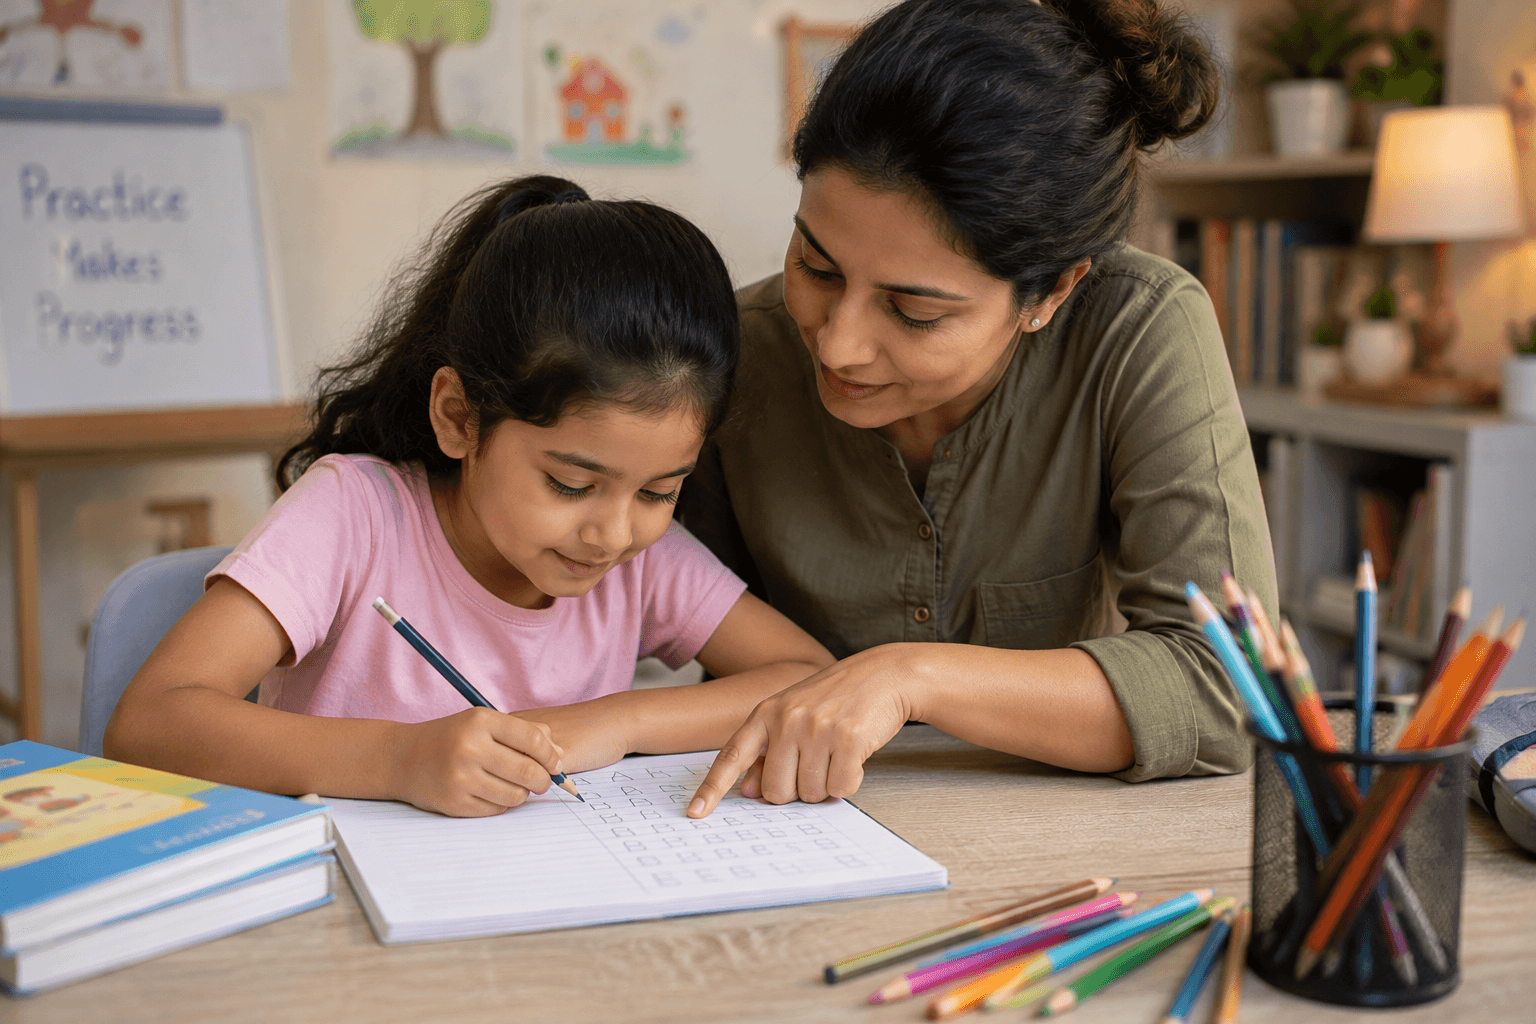
Handwriting is not one skill that children master in a single step. A child has to learn how letters are formed, how they sit on the line, how much space to leave between words, how to control the pencil, and eventually how to perform these movements without thinking about every stroke. Effective instruction therefore needs more than repetition. Current handwriting guidance emphasises explicit teaching of letter formation, supervised practice, feedback and regular distributed practice, while multisensory approaches can give children additional ways to understand and remember movements.
This guide compares 10 practical methods for teaching handwriting to children, explaining where each one works best, what it actually teaches, and how parents can try it at home.
Best suited for parents and educators supporting children roughly between ages 4 and 10, particularly when handwriting is still developing or a child is struggling with consistency, spacing, formation or writing fluency.
Why the Same Handwriting Method Does Not Work for Every Child
Want a page to practise on?
Letter and word pages, sorted by age.
Book a free handwriting class (ages 5–13) →A five-year-old learning to write the letter "S" is solving a very different problem from a nine-year-old whose letters are already recognisable but become increasingly messy during long answers. Yet both children are often given the same solution: another handwriting worksheet.
Consider a child who repeatedly writes lowercase letters from the bottom upward. The parent may keep asking the child to copy the correct version, but the underlying movement has never actually been taught clearly. Another child may know exactly how to form each letter but leave almost no space between words. Giving that child more letter-formation practice will not solve the real problem.
This is why good handwriting instruction for kids begins by identifying the particular difficulty rather than choosing a favourite method and applying it to everyone. Research-informed teaching guidance recommends explicit modelling of letter formation, verbal and visual support, supervised practice and feedback, while also recognising that children may need adaptations to writing materials, posture or practice conditions.
The methods below are therefore not ranked from "best" to "worst." They solve different problems. The better question is which method matches what the child is struggling with right now.
Method 1: Explicit Letter Formation
One of the simplest methods is also one of the easiest to underestimate: actually showing children how a letter is formed instead of assuming that repeated copying will teach them.
A parent might place a lowercase "a" on the page and say, "Copy this." The child looks at the finished shape and attempts to reproduce it, but may begin the stroke in the wrong place or use too many movements. A more explicit approach breaks the letter into a sequence. The adult demonstrates where the movement begins, how it travels, and where it finishes, while the child watches and then reproduces the movement.
This matters because children are not simply learning what a letter looks like. They are learning a motor pattern. Research-based handwriting guidance recommends modelling letter formation with visual, verbal and motor support, followed by guided practice and feedback.
At home, this can be as simple as choosing two or three letters rather than an entire alphabet. Demonstrate the movement slowly, have the child describe what they are doing, and then let them practise independently. The goal is not to produce dozens of repetitions. It is to make the movement itself understandable.
Method 2: Teach Similar Letter Movements Together
Once children know several individual letters, grouping letters according to how they are formed can make practice more coherent. Instead of moving randomly from "a" to "K" to "m" to "S," children can work with letters that share similar movement patterns.
For example, letters involving similar starting strokes or curves can be practised together. The child begins recognising that handwriting is not a collection of completely unrelated shapes. Certain movements appear again and again, and becoming comfortable with one movement can make another letter easier to learn.
This approach is particularly useful when a child seems to "forget" letters frequently. The problem may not be memory in the usual sense. The child may not yet have a stable motor pattern for the movement. Grouping letters by similar formation reduces the number of completely new movements the child has to manage.
It also makes practice easier to explain. Rather than saying, "You need to practise these six letters," a parent can say, "These letters begin in a similar way, so we're going to work on that movement first." The child begins to see handwriting as a system rather than a collection of shapes.
Method 3: Add a Multisensory Layer
Some children understand a movement more easily when they can see it, feel it and perform it rather than simply look at a model on paper. This is where multisensory handwriting practice becomes useful.
A child might trace a letter with a finger before writing it with a pencil, form letters in a tray of flour, practise on a textured surface, or use a wet sponge on a small board. These activities are not meant to replace ordinary handwriting. Their value is that they give children another way to experience the movement before transferring it to paper. Reading Rockets and Understood both describe multisensory techniques such as textured surfaces, tracing and "Wet-Dry-Try" as ways to support handwriting practice.
For a child struggling with the formation of lowercase "b," for instance, tracing the movement with a finger can make the direction and sequence more concrete before the pencil comes back into the picture. A child who constantly reverses or changes a letter may benefit from experiencing the movement physically rather than being shown the finished shape repeatedly.
The important distinction is that multisensory practice should have a purpose. Turning every handwriting session into a sensory activity can become distracting. Use it when the child is having difficulty understanding or remembering a particular movement, then transfer that learning back to normal writing.
When This Method Is Most Useful
- When a child struggles to remember how particular letters are formed.
- When letter formation feels mechanical or uncertain.
- When ordinary copying has produced very little improvement.
- When a child responds well to movement, touch or visual cues.
Method 4: Use the Page as a Teaching Tool
Sometimes the problem is not the letter itself. It is where the letter goes.
A child may know how to form lowercase "o" perfectly but write it floating above the line. Another may make letters so large that there is hardly any room left between lines. Instead of repeatedly saying "stay on the line," parents can change the page so that the writing space gives the child more information.
Bold or raised lines can make the boundaries easier to see and feel. Understood and Reading Rockets describe using stronger line cues, including raised lines, to help children understand where letters should sit and how tall different letters should be.
This method is particularly helpful because it moves some of the teaching away from verbal correction. The page itself becomes a guide. A child who repeatedly crosses the bottom line, for example, receives an immediate physical or visual cue that the letter has moved outside its intended space.
The same principle can be used for letter size. Children can be taught to distinguish between tall letters, small letters and letters that descend below the baseline. A simple visual system such as "sky, grass, dirt" can help younger children understand these differences without turning the explanation into a grammar lesson.
The key is to gradually reduce the support. The child should eventually be able to maintain appropriate size and alignment on an ordinary page rather than becoming dependent on specially marked paper.
Method 5: Teach Spacing as a Separate Skill
Parents usually notice spacing only when it becomes a problem. A child's letters may be formed correctly, but the words gradually run together until an otherwise readable sentence looks crowded. The usual instruction is, "Leave some space," but that does not necessarily tell a young child how much space is enough. When children are simultaneously thinking about letter formation, spelling and what they want to say, spacing is often one of the first things to disappear.
Instead of asking a child to correct spacing across an entire page, give the idea a physical reference. A child can use a finger, a small spacer or the width of a familiar object to understand the approximate distance between words. After several guided examples, gradually remove the support and ask the child to maintain the same spacing independently. The purpose is not to make the child dependent on a spacer but to help develop an internal sense of word boundaries.
This method is especially useful when copying individual words looks reasonably neat but sentences become crowded. The underlying problem may not be letter formation at all. The letters themselves can be perfectly recognisable while inconsistent spacing makes the writing harder to read.
Method 6: Build Handwriting Through Short, Meaningful Writing
There is a point where handwriting practice needs to leave the worksheet. A child can spend several minutes copying beautifully formed sentences and then return to ordinary schoolwork and immediately revert to old habits. Copying and independent writing place different demands on the child. During copying, the words are already available. During independent writing, the child has to think about an idea, choose words, construct the sentence and manage the physical act of writing at the same time.
This is why meaningful writing should become part of handwriting instruction once the child has some control over the basic movements. A parent might ask a child to write three sentences about a favourite toy, label a drawing, make a short shopping list, describe something they saw outside, or write a note to a family member. The writing does not have to be long. Its purpose is to make the child use the handwriting skill while actually communicating something.
The distinction is simple: do not replace all handwriting practice with free writing, but do not keep handwriting isolated from real writing either. A few focused formation exercises followed by a short piece of purposeful writing can reveal whether the skill is beginning to transfer.
This method also makes practice less mechanical. When a child has something they genuinely want to say, the pencil becomes a means of communicating rather than the entire focus of the activity.
Method 7: Practise From the Model, Then Gradually Remove It
Copying has an important place in early handwriting instruction, but children can become overly dependent on looking at the example immediately before producing every letter. A stronger progression is to gradually move them from imitation towards recall.
For example, a parent might demonstrate a difficult letter and allow the child to copy it several times. Once the movement becomes familiar, the model can be covered and the child can try forming the same letter from memory. The parent can then check the movement and provide a correction if necessary. Later, the same letter can appear inside words without any visual model beside it.
This small change tells you something important about whether the child has actually learned the movement. A letter that looks perfect when copied but changes dramatically when the model disappears may not yet be automatic. That is not a failure; it simply tells the parent that more guided practice is needed before moving on.
The same approach can be used with cursive writing, joining patterns, letter size and even spacing. The child first receives enough support to understand the skill, then gradually takes responsibility for producing it independently.
Method 8: Slow Down the Movement Before Asking for Speed
"Write faster" is rarely a useful handwriting instruction for a child whose movements are not yet secure. Speed usually develops as the movement becomes easier, not because a child is repeatedly told to increase their pace. When children hurry before they have developed control, letters may become incomplete, spacing can disappear and pencil pressure often increases.
A better method is to deliberately practise the movement at a comfortable pace and then allow speed to increase gradually. If a child is learning a particular letter connection, for instance, the first few repetitions can focus entirely on keeping the movement smooth and consistent. Once that becomes comfortable, the child can use the same pattern in words and then in short sentences.
This is particularly useful for children who produce beautiful handwriting during short exercises but become extremely messy whenever they have to finish schoolwork quickly. Their problem may not be that they cannot write neatly. They may simply not yet have enough writing fluency to maintain that quality at a faster pace.
Parents can test this without turning practice into a race. Give the child a short sentence and ask them to write it comfortably while keeping the writing readable. Repeat the activity another day and see whether the same quality can be maintained with slightly less hesitation. The target is controlled speed, not maximum speed.
Method 9: Use Immediate Feedback Instead of Delayed Correction
A child can repeat an incorrect movement several times before an adult notices it. By then, the pattern may already be becoming familiar. This is why feedback is most useful when it is close to the moment the movement occurs. However, immediate feedback does not mean interrupting every single letter. Constant correction can make children hesitant and overly dependent on adults.
The better approach is selective feedback. If a child is repeatedly forming a particular letter incorrectly, intervene early enough to prevent the pattern from becoming automatic. If the child makes one isolated mistake while the rest of the writing is progressing well, it may be better to let the sentence finish and address it afterwards.
The child should gradually understand what they are correcting and why. Instead of simply saying, "Wrong," a parent might point out that the letter started from the wrong place or that the movement became reversed. Over time, this gives children a way to recognise their own mistakes.
Match the Method to the Difficulty
Parents do not need to use all ten methods every day. Trying to combine everything can make handwriting practice unnecessarily complicated and can leave children with too many things to think about. The more useful approach is to observe what is happening and choose the method that addresses the actual difficulty.
If a child forms letters inconsistently, return to explicit letter formation rather than simply asking for more repetitions. When similar letters repeatedly cause confusion, grouping them around common movements can make practice easier to understand. A child who struggles to remember a particular movement may benefit from a multisensory activity before returning to pencil-and-paper work, while a child whose letters repeatedly float above or below the line may need stronger visual or tactile line cues.
Spacing deserves its own attention when words are consistently crowded. If copying looks good but independent writing quickly becomes messy, meaningful writing can reveal whether the child is able to transfer the skill while thinking about language. When a child depends heavily on a model, gradually removing that model can show whether the movement has actually become familiar. And when writing deteriorates mainly because the child is rushing, practising a comfortable, controlled pace is more useful than repeatedly demanding greater speed.
The same principle applies to mistakes that keep returning. Rather than correcting the entire page after the child has finished, focus on the recurring movement while the child is still learning it. The objective is not to correct everything immediately. It is to give the child enough useful feedback that the correct movement gradually becomes easier to reproduce independently.
Method 10: Connect Handwriting Practice to Everyday Writing
The final method is perhaps the one that determines whether all the others actually transfer beyond practice sheets. Children ultimately need handwriting for purposes that have nothing to do with handwriting worksheets. They need to write answers in school, complete assignments, label diagrams, make lists, write cards, record ideas and communicate with other people.
A child might therefore spend a few minutes practising a difficult formation and then use the same letters in a short message to a parent. Another child could practise spacing and then write a small description of their favourite game. Someone working on writing pace could complete a few sentences from a school assignment while trying to maintain readable handwriting without unnecessary pauses.
This kind of transfer matters because a child can become very good at completing a handwriting exercise without becoming equally comfortable using handwriting in everyday situations. The final method is therefore not about adding another worksheet. It is about taking the skills developed through the previous methods and giving children opportunities to use them where writing has an actual purpose.
The strongest handwriting teaching methods for kids are not competing systems that have to be followed rigidly. They are tools. Explicit modelling can clarify a movement, multisensory practice can make it easier to remember, guided repetition can build consistency, meaningful writing can test transfer, and focused feedback can help the child gradually take control of the process themselves. The right combination depends on what the child is currently finding difficult.
Which Method Should Parents Start With?
The easiest mistake to make after reading about ten different methods is to try all ten at once. A child who is already struggling with handwriting can quickly become overwhelmed if every line comes with a new instruction about grip, size, spacing, formation, speed and posture. Good teaching is usually more selective. The aim is to identify the point where the child's writing currently breaks down and choose the method that addresses that particular difficulty.
A useful starting point is to observe the child during ordinary writing rather than during a specially prepared demonstration. Watch what happens when they write a sentence from memory, copy something from a book and complete a longer piece of schoolwork. The differences can tell you much more than a single worksheet. If the child knows how letters should look but cannot reproduce them consistently, formation practice may be the right starting point. If the letters are clear but words crowd together, spacing deserves attention. If the writing looks fine for five minutes and then deteriorates, pace and endurance may matter more than another round of copying.
This is also where parents should resist the urge to label a child as "messy." Messy handwriting describes the appearance of the page, not the reason behind it. Two children can produce equally untidy writing for completely different reasons, and they therefore need completely different support.
What Good Handwriting Practice Looks Like at Home
Once a method has been chosen, the home routine should remain simple enough for the child to concentrate on the actual skill. A practice session does not need to contain every handwriting exercise a parent has discovered online. It needs a clear purpose, enough repetition to make the movement familiar, and an opportunity to use that skill in ordinary writing.
For example, if a child is working on letter formation, a parent might spend a few minutes modelling and practising two difficult letters before asking the child to use them in words. If spacing is the focus, the session can move from a few carefully written phrases to a short paragraph. If pace is the problem, the child can practise maintaining readable writing across a small amount of text without being pushed to write as quickly as possible.
The important progression is from supported practice to independent use. Children should not remain dependent on tracing lines, visual models or constant reminders forever. Those supports are useful because they make a difficult skill easier to understand, but they should gradually disappear as the child becomes more confident.
Parents can also make practice more useful by keeping the feedback narrow. If today's goal is spacing, there is little value in interrupting the child every time a letter is slightly too large. The child needs enough mental space to concentrate on the skill being taught.
A Practical Home Routine
A simple session can be organised around four stages without turning handwriting into a rigid daily programme.
- Warm up the movement: Begin with a few letters, joins or simple patterns that prepare the child for the skill being practised.
- Teach one specific point: Demonstrate the movement or feature clearly and let the child practise it with guidance.
- Use the skill in real writing: Move from isolated practice into words, sentences or a short piece of meaningful writing.
- Finish with one useful observation: Identify what improved rather than turning the final minute into a list of corrections.
This structure gives children repetition without making repetition the entire experience. It also gives parents a way to see whether the skill is transferring beyond the exercise itself.
Why "Write Neatly" Is Not a Teaching Method
"Write neatly" sounds like useful advice because everyone understands what the parent means. The problem is that it gives the child no information about what to change. A child cannot consciously improve an outcome they cannot break into manageable actions.
A teacher might instead notice that the child's letters are becoming increasingly large, so the immediate focus becomes size. Another child may have perfectly formed letters but almost no space between words. A third may be writing so quickly that the final letters in each word become incomplete. These children all appear to have a handwriting problem, but the instruction they need is different in each case.
This is why effective handwriting teaching methods tend to be specific. Children improve more easily when they know what they are practising and can recognise whether they are doing it successfully. The adult's role is not to make the page perfect. It is to make the next improvement understandable.
When to Seek Teacher Help
Home practice is useful for many everyday handwriting difficulties, particularly when the child is still developing basic control and needs regular opportunities to practise. However, there are situations in which another worksheet is unlikely to solve the problem. If a child continues to find writing unusually difficult despite consistent, focused practice, it is worth looking beyond the number of pages being completed.
A teacher can provide valuable context because they see the child's writing across different subjects and situations. A child who writes comfortably for five minutes at home may struggle when copying from the board or completing a long answer in class. Another child may appear reluctant during handwriting practice but have no difficulty when writing something they genuinely enjoy. Understanding these differences helps determine whether the issue is primarily handwriting, task demand, motivation, or the way practice has been structured.
Parents should consider seeking additional guidance when handwriting consistently causes physical discomfort, remains unusually slow, significantly interferes with schoolwork, or leads the child to avoid written tasks altogether. Persistent difficulty with pencil control, letter formation or maintaining readable writing over longer tasks can also justify discussing the situation with the child's teacher rather than simply increasing practice time.
Get teacher-led help with the Handwriting Course when your child needs structured practice, individual feedback and guidance matched to their current writing difficulties.
Teacher-led support can be particularly useful when parents have already tried several methods but cannot identify which one is actually helping. A trained teacher can observe the child's writing process, isolate the specific difficulty and adjust the practice accordingly instead of asking the child to repeat the same activity indefinitely.
The Best Method Is the One the Child Can Actually Use
There is no single handwriting method that will work equally well for every child. Explicit modelling can be invaluable when a child does not understand letter formation. Multisensory activities can make difficult movements easier to remember. Focused repetition can build consistency, meaningful writing can help children transfer skills into real situations, and carefully timed feedback can gradually teach them to recognise and correct their own mistakes.
What matters is how these methods are used. The strongest approach is rarely the one with the longest worksheet or the greatest number of exercises. It is the one that identifies what the child is struggling with, gives them an appropriate way to practise it, and then gradually helps them use that skill independently.
For parents, this also changes the way handwriting progress is judged. A child does not need to produce perfect handwriting after every practice session. Improvement may first appear as fewer pauses, more consistent letter size, easier spacing, less pencil pressure or greater willingness to write. Those small changes indicate that the underlying skill is becoming more secure.
Handwriting becomes much less frustrating when children understand what they are learning and why they are practising it. With the right method, regular opportunities to write and feedback that focuses on meaningful progress, the goal is not simply a neater notebook. It is a child who can write with increasing control, comfort and confidence.
Author: Disha Mishra writes about children's learning, handwriting development and practical ways parents can support skill-building at home. Her work focuses on turning everyday learning challenges into clear, useful guidance that helps children build confidence and develop skills through consistent, age-appropriate practice.
Frequently Asked Questions
1.What is the best method for teaching handwriting to a child?
There is no single best method for every child. The right starting point depends on what the child is struggling with. Explicit letter formation is useful when movements are unclear, while multisensory practice can help children who find certain formations difficult to remember. Spacing, writing pace and independent writing may require different approaches.
2.How long should a child practise handwriting each day?
The ideal duration depends on the child's age, ability and attention. Short, focused practice is generally more useful than extending a session after the child has stopped paying attention. The goal should be enough repetition to reinforce a skill while keeping the child physically comfortable and mentally engaged.
3.Is tracing a good way to teach handwriting?
Tracing can be useful when introducing a letter or helping a child understand its movement, but it should not be the only form of practice. Children eventually need to reproduce letters independently and use them in words and sentences. A useful progression is to move from tracing or modelling towards guided writing and then independent writing.
4.How can I teach handwriting without making my child bored?
Keep repetitive practice focused and give children opportunities to use the skill in meaningful writing. A few formation exercises can be followed by writing a note, describing a picture, making a list or completing a short sentence. This allows children to practise the physical skill while also experiencing writing as a way to communicate.
5.When should a parent get professional help for handwriting?
Consider speaking with a teacher or appropriate professional when handwriting remains unusually difficult despite regular practice, causes persistent discomfort, is significantly slower than expected, or interferes with schoolwork. Teacher observation can help identify whether the difficulty relates to handwriting mechanics, writing fluency, the practice environment or another learning demand.
Ready to improve this handwriting?
Letter and word pages, sorted by age.
Book a free handwriting class (ages 5–13) →